
Direct answer: Go solar by first estimating need from bills, then validating the roof and receiving an itemised design, completing financing and required portal or DISCOM approvals, and finally installing, inspecting, metering, commissioning and monitoring the system. Timelines vary with documentation, site readiness, equipment and utility processes. The project is complete only when the owner has drawings, serial numbers, approvals, test records, meter details, monitoring access, warranties and a working service route.
Introduction
The phrase “go solar in four steps” is useful only when each step contains the approvals, decisions and records that make a project work. This guide expands the journey from preliminary estimate to site survey, proposal, financing, installation, inspection, net meter, commissioning and monitoring. It explains who is responsible, what can delay progress and which documents a customer should retain after handover.
Quick Takeaways
- The journey runs from estimate to survey, proposal, approvals, installation and commissioning.
- Subsidy actions may need to begin before installation.
- Net meter timing is controlled by the DISCOM process.
- Keep drawings, serial numbers, invoices and certificates.
- Monitoring after handover confirms whether the system performs.
The four-stage solar journey
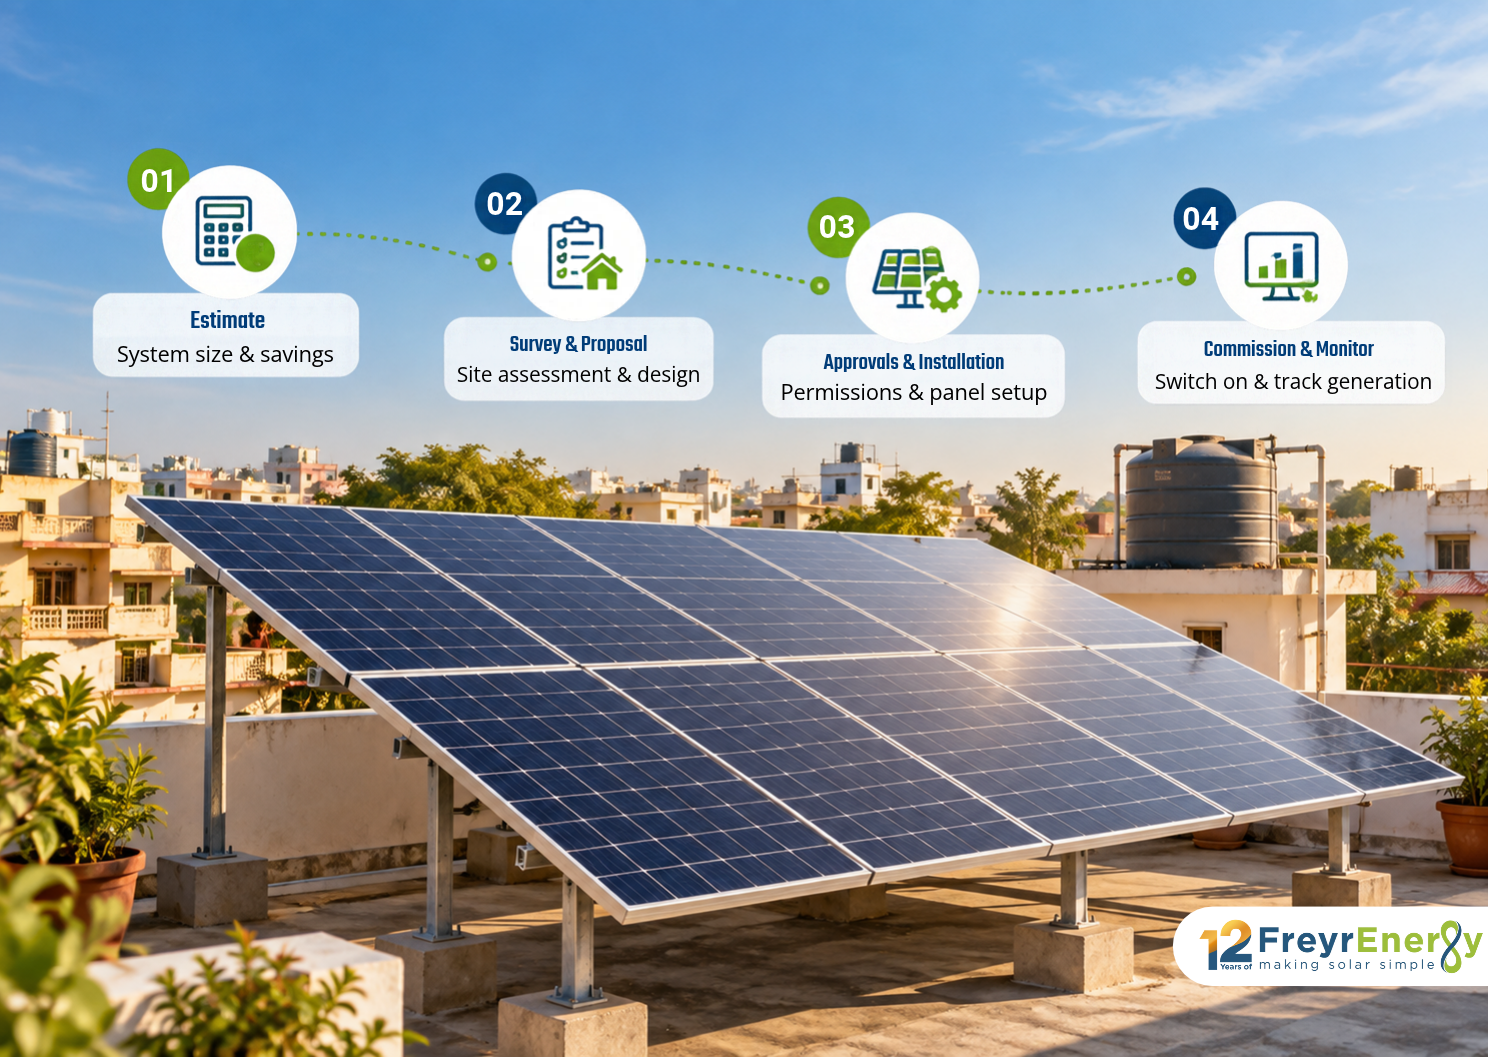
Stage | Customer decision | Main dependency |
|---|---|---|
Estimate | Goal and capacity range | Accurate bills |
Survey/proposal | Layout, equipment, price | Roof and electrical data |
Approvals/install | Vendor and finance | Portal/DISCOM/site readiness |
Commission/monitor | Accept performance baseline | Inspection, meter and records |
However, choosing the right capacity, evaluating the roof and coordinating installation can appear complicated. The Freyr Energy App simplifies the process by helping customers explore solar, access quotations, track project progress and monitor their systems from one platform.
Here is how you can begin your solar journey in four steps.
Step 1: Get a Solar Estimate
Start by entering basic information such as your location and average monthly electricity bill. These details provide an initial estimate of the system capacity and potential project cost.
You can also use the Freyr Energy solar calculator to estimate a suitable system for your electricity requirements.
The initial quotation is only an estimate. Final capacity, generation and pricing depend on factors such as:
- Electricity consumption
- Available shadow-free roof area
- Roof condition
- Local sunlight
- Selected equipment
- Installation requirements
- Applicable DISCOM regulations
Step 2: Complete the Site Survey and Finalise Your Order
Once you decide to proceed, the solar team reviews your requirements and conducts a site survey.
The survey helps assess:
- Usable roof area
- Shading from nearby objects
- Roof orientation and condition
- Electrical infrastructure
- Suitable system capacity
- Mounting and safety requirements
Based on the findings, you receive a customised system design and detailed proposal. Before finalising the order, review the equipment specifications, estimated generation, project scope, payment terms, warranties and installation timeline.
Read these precautions before installing solar panels to prepare your property for installation.
Step 3: Track the Installation
After confirming your order, the project moves through procurement, installation, testing and commissioning.
The Freyr Energy App helps you follow project and payment progress from one place. This provides better visibility into different stages of the solar-panel installation process.
Grid-connected projects may also require DISCOM approval, metering and verification. Timelines can vary according to the location, project requirements and electricity distribution company.
Step 4: Monitor System Performance
Once the system is commissioned, performance monitoring helps you understand how much solar electricity it generates.
The Freyr Energy App provides access to system-performance information and relevant project details. Regular monitoring can help identify an unexpected reduction in generation that may require cleaning, inspection or technical support.
For reliable long-term operation:
- Clean panels according to local dust and weather conditions.
- Monitor electricity generation regularly.
- Keep the panels free from new shading.
- Arrange periodic electrical and structural inspections.
- Follow the maintenance and warranty conditions in your proposal.
Review these solar-panel maintenance tips for additional guidance.
Start Your Solar Journey

Freyr Energy provides customised solar solutions for homes and businesses. Its services can include system design, shadow analysis, installation coordination, subsidy documentation and net-metering assistance.
Actual savings and generation depend on your electricity usage, system capacity, site conditions, tariffs and local regulations.
Step 1 Deliverable: A Defensible Preliminary Estimate
Collect 12 months of electricity bills, note future loads and define whether the goal is bill reduction, outage backup or both. A preliminary estimate should show proposed capacity, annual generation range, roof-area assumption, gross price, separately identified subsidy or offer, and the assumptions used for savings. It is a screening document, not the final design.
Step 2 Deliverable: An Approved Site-Specific Proposal
The site survey should measure usable area, shade, orientation, roof condition, access, cable route, earthing location, distribution-board capacity and grid connection. The final proposal should identify modules, inverter, structure, protection, monitoring, civil work, approvals, exclusions, warranties, payment milestones and estimated generation. Resolve roof repairs and permissions before ordering equipment.
Before signing | Document or evidence | Why it matters |
|---|---|---|
System size | Bills, sizing logic and layout | Prevents capacity chosen only from roof area or subsidy |
Equipment | Exact models and datasheets | Prevents ambiguous substitutions |
Structure and safety | Drawings, material and protection schedule | Clarifies roof, wind and electrical responsibility |
Commercial scope | Itemised price, taxes, exclusions and milestones | Reveals the true installed cost |
Approvals | Responsibility matrix and required consumer documents | Reduces portal and DISCOM delays |
Step 3 Deliverable: Installed, Inspected and Commissioned Plant
Installation includes more than fixing modules. The contractor must execute the approved layout, structure, cable management, isolation, surge protection, earthing, labels and monitoring. Grid-connected projects may then require inspection, meter work and approval before normal export. Never energise or alter the plant outside the authorised commissioning procedure.
Step 4 Deliverable: A System the Owner Can Operate and Prove
- Approved layout, single-line diagram and final equipment schedule.
- Invoices, serial numbers, datasheets and separate warranty documents.
- Electrical and earthing test results, commissioning and inspection records.
- Net-meter or interconnection documents and subsidy records where applicable.
- Monitoring login, baseline generation estimate and alarm-escalation process.
- Cleaning, shutdown, emergency, maintenance and roof-access instructions.
- Service contacts, response expectations and insurance documentation.
What Commonly Delays the Journey?
Consumer-name mismatches, missing roof authority, structural repair, equipment changes, finance approval, portal feasibility, meter availability and DISCOM inspection can all affect timing. An installer should provide a stage-based schedule with dependencies rather than promise one universal number of days. Track dates and documents at each stage so the responsible party and next action remain clear.
Who Does What?
Party | Typical responsibility to confirm | Evidence |
|---|---|---|
Customer | Accurate account, property authority, finance documents and approvals requiring consent | Bills, identity, ownership or authorisation records |
Installer/EPC | Survey, design, supply, construction, testing and agreed process support | Proposal, drawings, schedule and responsibility matrix |
DISCOM | Feasibility, inspection, interconnection and metering under applicable rules | Portal status, inspection and meter documents |
Lender | Credit approval, disbursement and loan servicing | Sanction letter, APR, fees and repayment schedule |
Manufacturer | Product warranty under stated terms | Datasheet, serial numbers and warranty certificate |
How to Inspect the Finished Work

- Modules match the approved model and serial-number list.
- Structure, clamps and roof interfaces match the drawing and show no obvious damage.
- Cables are supported, protected, labelled and not resting in water paths or on sharp edges.
- Isolation, breakers, surge protection and earthing are installed and documented.
- Inverter and meter readings are demonstrated, and monitoring access works.
- The installer explains safe shutdown, emergency contacts and what the customer must not operate.
The First 90 Days
Review daily monitoring for obvious interruptions, then compare monthly generation and the first complete utility bills with the expected pattern. Confirm that import/export registers and credits appear correctly. Record unresolved snags in writing before any final retention or service window closes. Seasonal variation means one month cannot prove annual performance, but it can reveal commissioning and billing problems.
Four Steps With Entry and Exit Criteria

Step | Start only when… | Complete only when… |
|---|---|---|
1. Estimate | Bills and objectives are available | Capacity range, budget and assumptions are documented |
2. Survey and proposal | Property access/authority is clear | Layout, BOM, SLD, price, approvals and contract are approved |
3. Install and commission | Materials, permits and site readiness are confirmed | Tests, inspection, meter and authorised commissioning are complete |
4. Monitor and maintain | Handover records and logins are received | Baseline, alerts, service and maintenance routine are working |
Responsibility and Evidence Matrix
Workstream | Primary party to identify | Evidence |
|---|---|---|
Property/consumer data | Customer | Bills, ID, ownership/NOC and bank details |
Engineering | Installer/EPC | Survey, layout, SLD, structure and yield model |
Government/DISCOM process | Customer, vendor and DISCOM as prescribed | Portal status, feasibility, inspection and meter records |
Finance | Customer and lender | Sanction, APR, fees, disbursement and CFA treatment |
Product warranty | Manufacturer | Model, serial number and warranty certificate |
Workmanship/service | Installer/EPC | Contract, response route and handover pack |
Realistic Timeline Logic
Do not publish one universal installation timeline. Site survey, roof repair, finance approval, equipment availability, portal feasibility, DISCOM inspection and meter work can run at different speeds. A useful schedule shows dependencies, owner, target date and evidence for each milestone. Physical installation may be short while the full application-to-commissioning journey is longer.
Commissioning and Handover Tests
- Verify equipment models, serial numbers and installed DC/AC capacity.
- Review insulation, polarity, earthing and protection test records.
- Demonstrate inverter start/stop, alarms, meter registers and monitoring.
- For hybrid systems, demonstrate outage isolation and approved backup loads.
- Receive drawings, approvals, warranties, invoices, login and service contacts.
- Record open defects in a signed punch list before final payment.
Conclusion
Going solar becomes manageable when the customer knows the sequence and owns the records. Begin with accurate bills, approve a site-specific design and itemised scope, complete portal or DISCOM steps in the required order, and inspect the installed safety and monitoring systems before handover. Keep every drawing, invoice, serial number, certificate and approval. After commissioning, establish a generation baseline and review it regularly so a silent fault is noticed early rather than on the next high bill.